

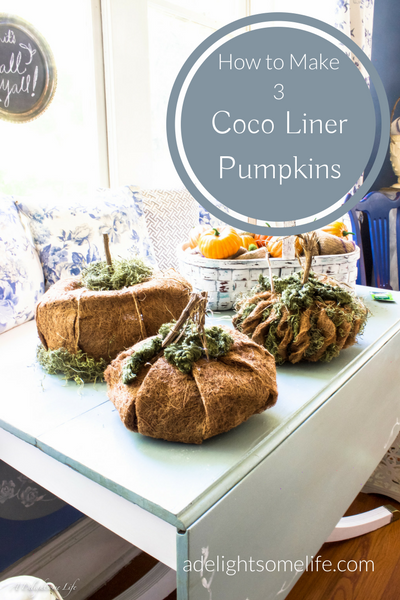

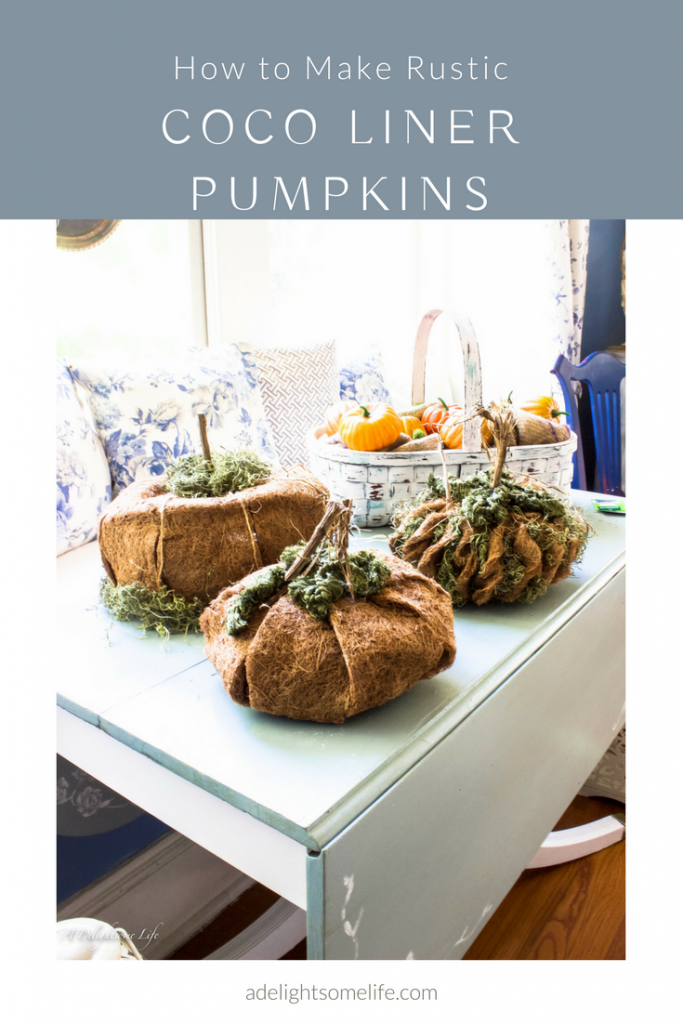
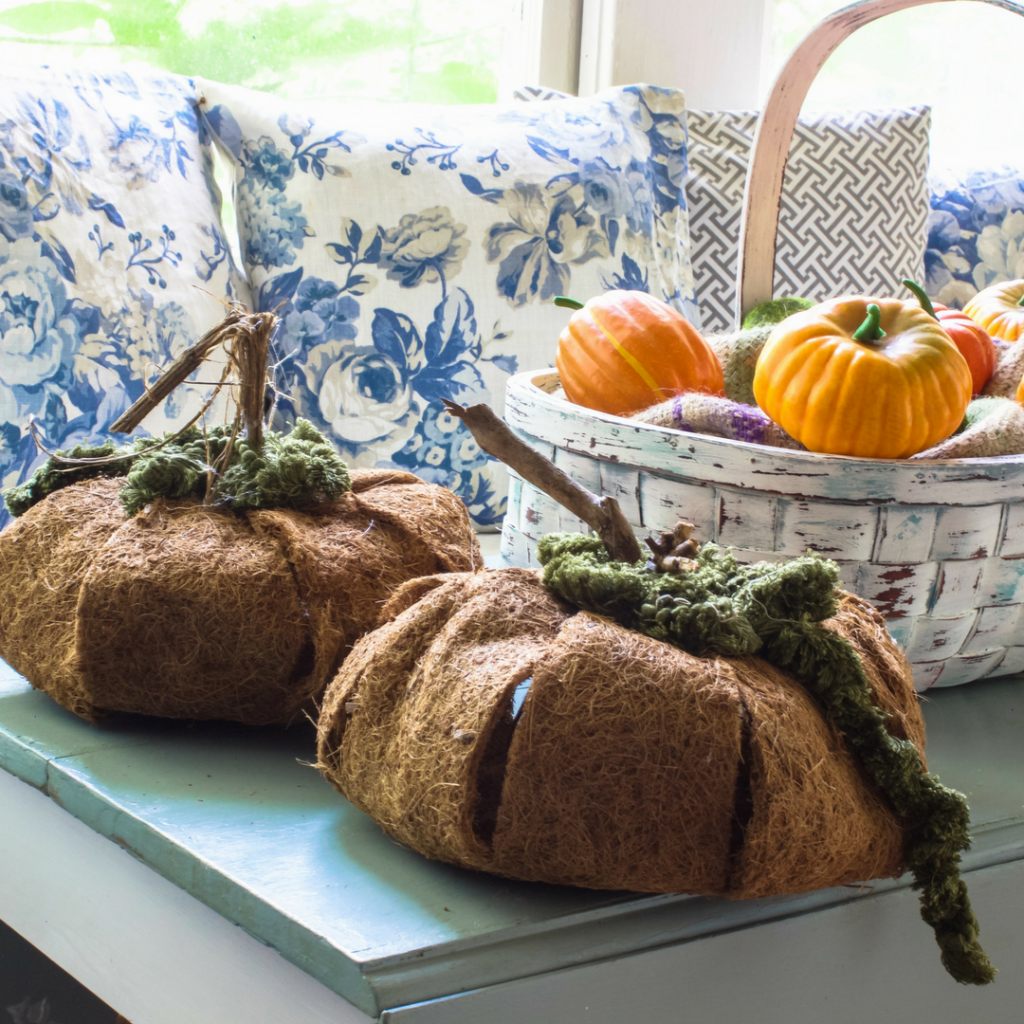
Coco Liner Pumpkins
I have been looking for ways to make budget-friendly DIY fall decor to decorate with and to share with you. While shopping a couple weeks back, I came across a few coco fiber hanging plant liners. I could always use them and LOVE a good sale. There they sat all cute and stacked waiting for storage as I was busy as a bee decorating for fall. While contemplating what I had around the house to make pumpkins my gaze landed on these sweeties. They were already shaped somewhat like pumpkins – or the beginnings thereof. I tried to bring the top together – but the whole thing collapsed. Then I thought of cutting the sides and gathering…this led to some cute pumpkins!

How to Make Awesome Rustic Coco Fiber Pumpkins
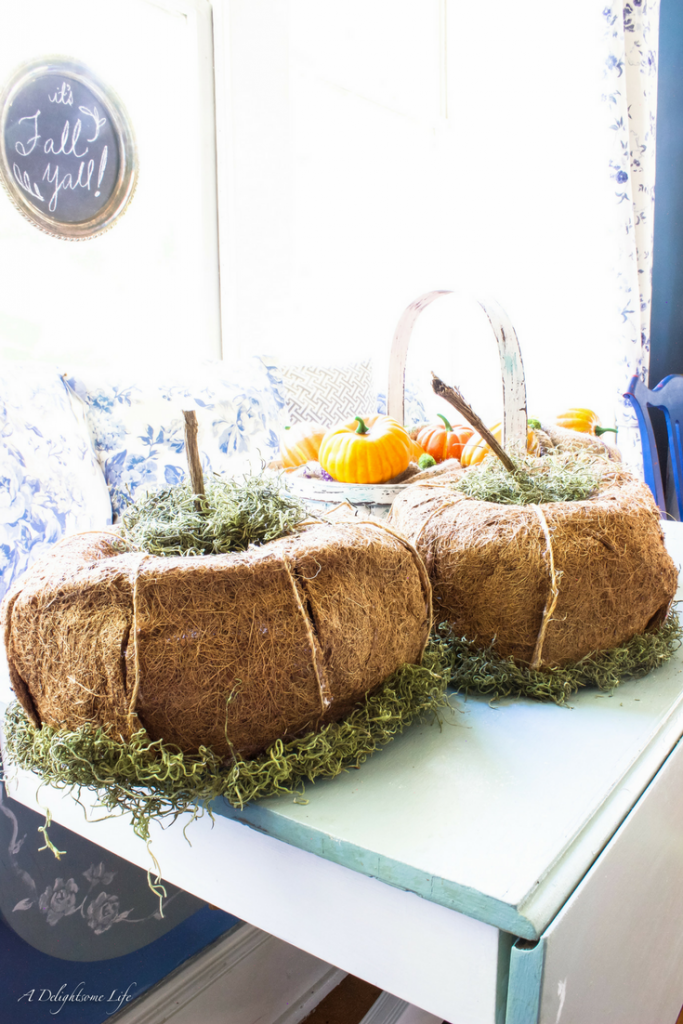
These babies are secured in a cup shape by something like fishing wire inside and they’re pretty firm. But, when I cut the cocoa fiber at the top and made slits – the whole circle lay flat. I then made petals out of each section to bring back together imitating the sides of a pumpkin.
What if I Twirled the sides?
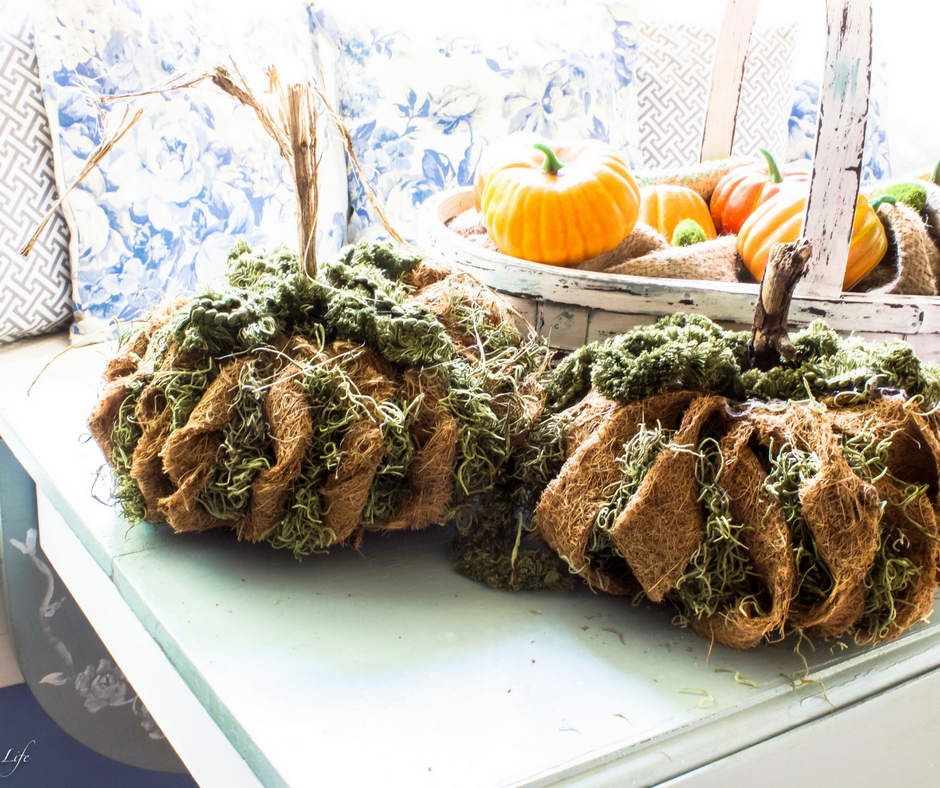
After I made the first pumpkin successfully, I wanted to try to get a different look. I made more petals this time, made them slimmer and twirled them before securing them together. This worked well, especially when I filled it with moss to keep its shape.
So, I had Six Coco Fiber Shells…how about a Third Design
This time, I did this pumpkin – upside down. I simply made slits and connected the sides overlapping the cut slits with twine. I secured the bottom with a disposable plate and made the sides with twine. This was the simplest one to make – although they’re all pretty easy!
Here’s How to Make the Rustic Coco Fiber Pumpkins
Materials You’ll Need:
- coco liners
- scissors
- twine
- needle – large
- hot glue and hot glue gun
- Spanish Moss
- upholstery trim
- stems
- paper plate (for pumpkin #3)
- pliers
Pumpkin #1
- Fold the coco fiber filler in half then in fourths – make slits with scissors
- fold between each slit making another totaling 8 petals. Cut to the base of the center (see PDF)
- Make each slice into petals leaving about an inch at top
- Overlap one petal over another at the top at an angle sew together with twine with one stitch- the top of the coco liner is thicker, you may need to pull needle through with pliers – sew stitch attaching petals )see image)
- Once all petals are attached hot glue a stem to the inside center of the pumpkin.
- Make loops with upholstery trip for leaves – hot glue onto the pumpkin round the stem
Pumpkin #2
- Similarly to pumpkin #1 only cut each ‘petal’ into 2 resulting in 16 petals. Cut into petals (see image on PDF) making them narrow. The top will be about 1/2 inch wide
- twist the first petal three times toward the right – hold; twist the second petal toward the right and overlap the top to the first petal. Attach with a stitch using the twine – similarly to pumpkin #1 complete all way round
- Fill the pumpkin with Spanish moss through the center pushing the moss to the edges to give shape to the pumpkin. Separate the petals showing some Spanish moss – (see image in PDF)
- Attach stem with hot glue through center of Spanish Moss
- Top pumpkin with upholstery trim similarly as with pumpkin #1
Pumpkin #3
- Cut coco liner in eight equal petals leaving the base wider (just to where it curves to base) Attach each petal overlapping right over left attaching with twine with one stitch
- Turn over pumpkin. Glue on each seam twine
- At the top cut a slit for the stem long enough to reach the base – attach pumpkin with hot glue round the edges to a paper plate and attach the stem to a glob of hot glue at center of the plate and attach pumpkin with hot glue round the edges to a paper plate
- Glue Spanish moss round the stem of the pumpkin and round the base of the pumpkin to cover the plate
More visual and instructions for each pumpkins are provided for in the free PDF
I’ve made different kinds of pumpkins -check them out – Pink Velvet and French Stamp Fabric. From what do you like to make pumpkins for your decor? If you give this a try, let me know!


