


Mitered Corner Pillow Shams
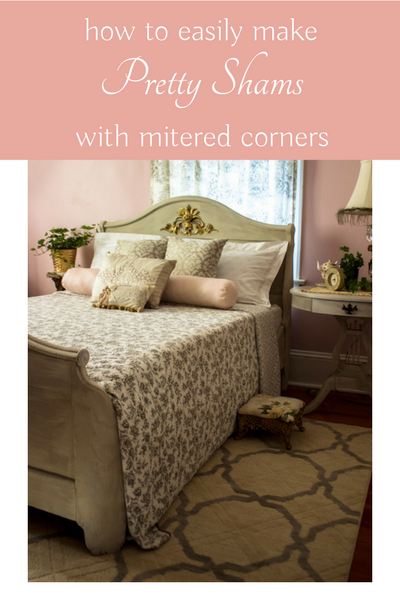
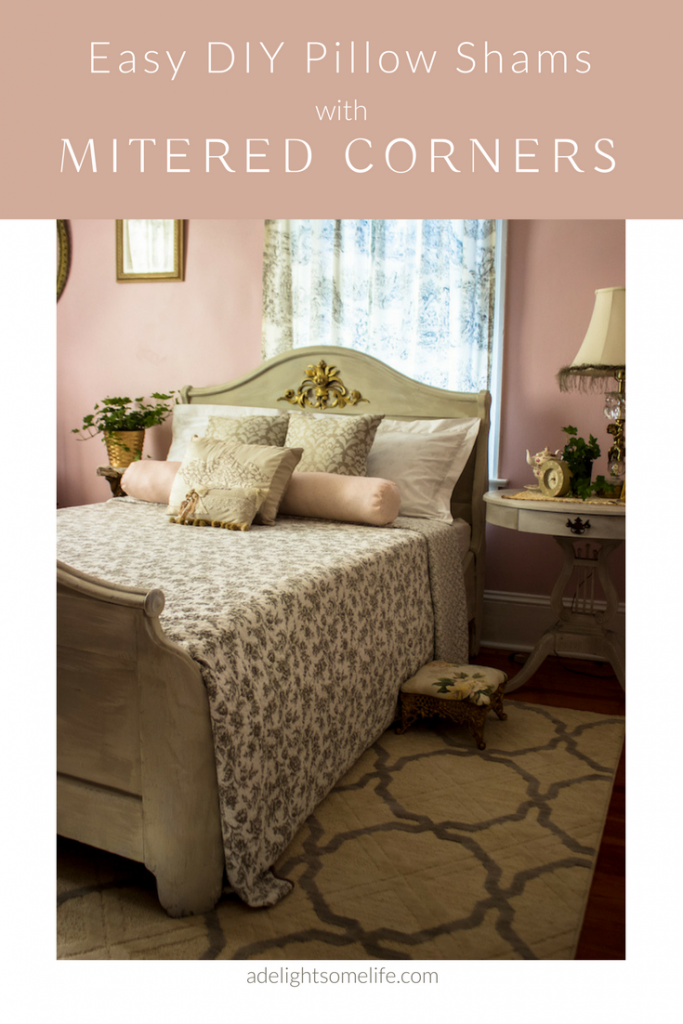
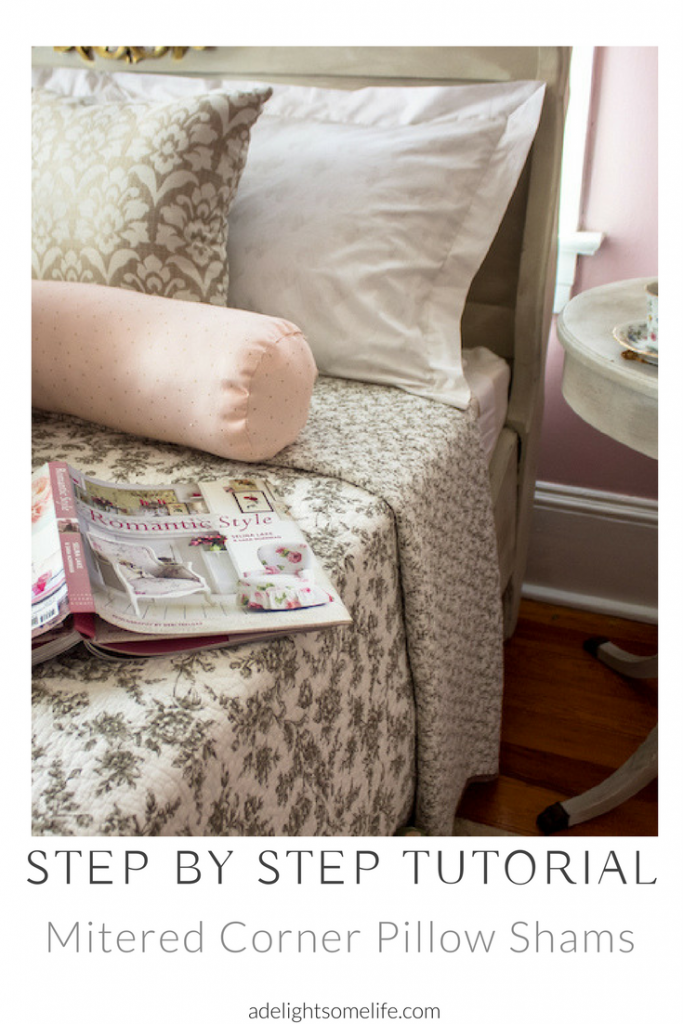
Making pillow shams with Mitered Corners. I love the comforter I found for our guest bedroom. It was perfect, it was a such a good deal! Really! It was however, missing pillow shams…that’s o.k. I can make these shams! Right?! Not only that, but I wanted to make pillow shams with Mitered corners.
DIY Pillow Sham
As I do with a lot of DIY projects – I figure this out step by step for myself first. I give it a try. Sometimes it doesn’t work out, then I figure out why…then if it works – yay! I share! This project was much easier once I drew out my plan and made the first one. I love how it turned out too! I didn’t have fabric with a complimentary pattern, so I went with some lovely white fabric I did have.
I’m a bargain girl at heart along with a DIY girl. The majority of the fabric I have comes from a fabric warehouse that has a couple annual sales -fabric by the pound. I can-and have sometimes done– gone crazy there. That’s also where I found the lovely comforter – again sold by the pound. Amazing savings!
What does it mean to Miter a Corner?
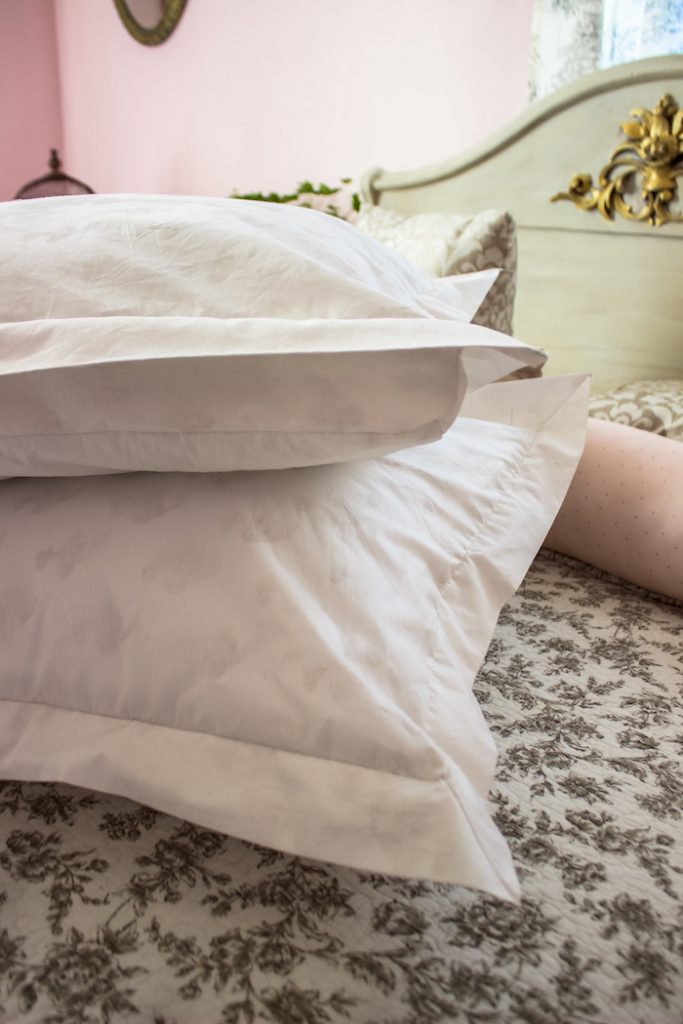
A miter joint (mitre in British English), sometimes shortened to miter, is a joint made by beveling each of two parts to be joined, usually at a 45° angle, to form a corner, usually a 90° angle. I love the clean look of the mitered corner. To me, it gives the pillow a sort of picture frame look.
Here’s How I made the Mitered Corner Pillow Shams
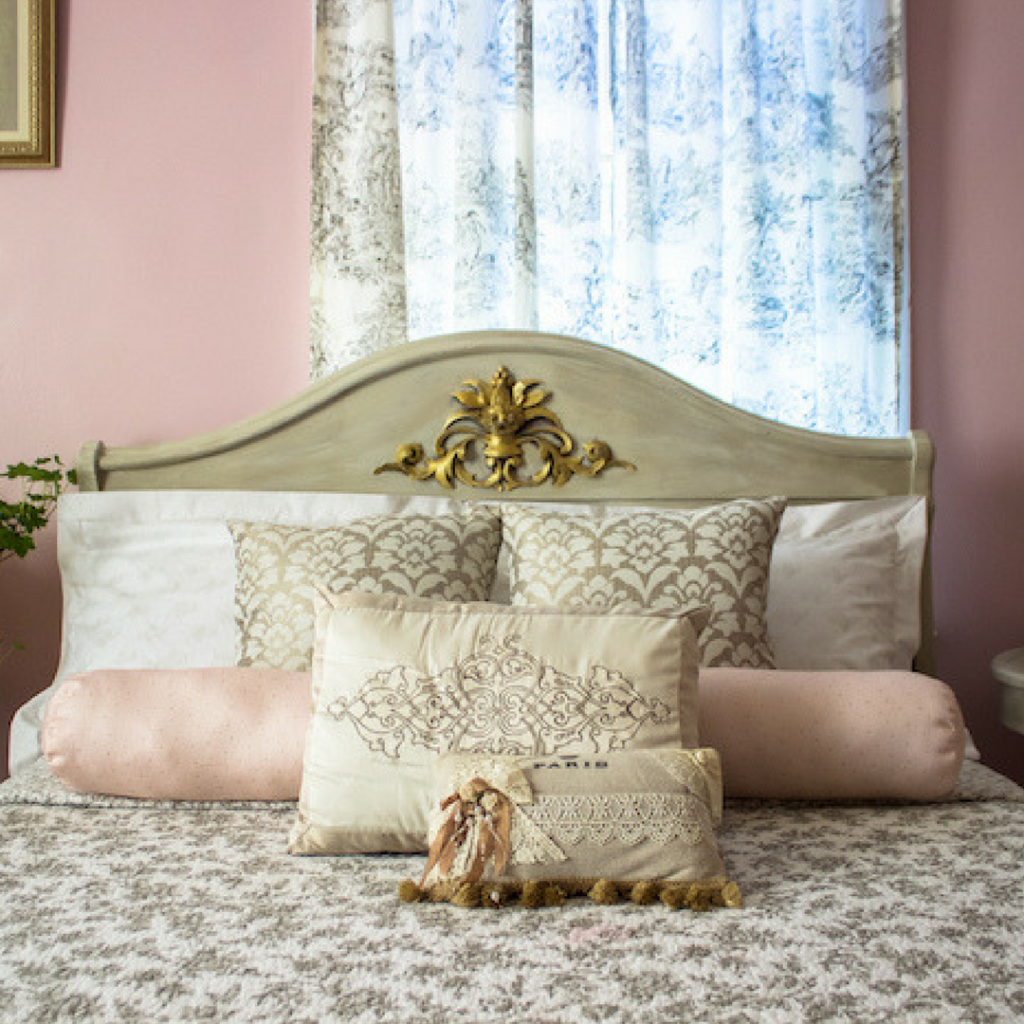
Not only did I make the front panel to have mitered corners, the back panel is the envelope style. That is two pieces overlapping the other. I love making envelope style pillow covers. It makes changing out pillows in decor so easy!
Step by Step Instructions:
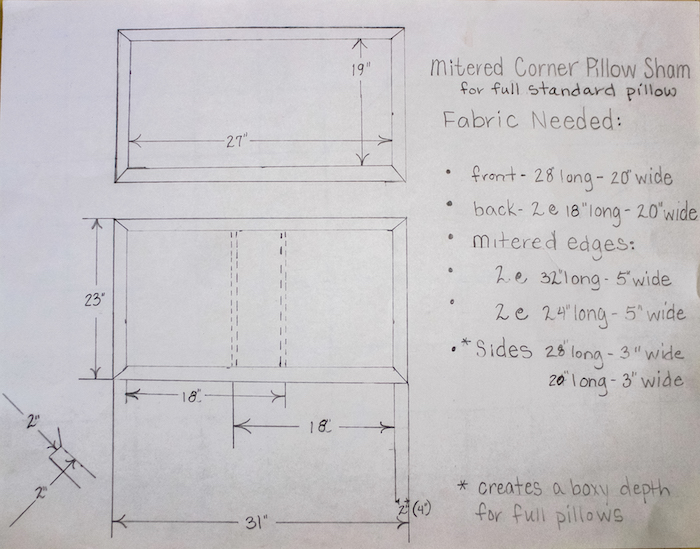
- Measure your pillow. Mine was 26×20 inches and very full. So I decided to add a box side so that the Mitered edge would look more like a picture frame
- Select your fabric – cotton is best and he weight of the fabric should be ‘home decor‘
- Cut your fabric into 1 front panel, 2 back panels, 4 flanges – two for top and two for bottom and 4 sides to create the ‘box effect – see diagram
- Iron the four flange pieces lengthwise in half with the cut edges meeting
- Sew the seam edge for the two back panels
- Pin the top flange piece to the front panel by finding the center of both and pinning from the center first then pinning towards both edges.
- Repeat with all flange pieces
- Leave 1/4 inch seam allowance along each edge
- Sew the flanges to the front panel with a 1/2 inch seam remembering to leave 1/4 inch sewing allowance at each corner.
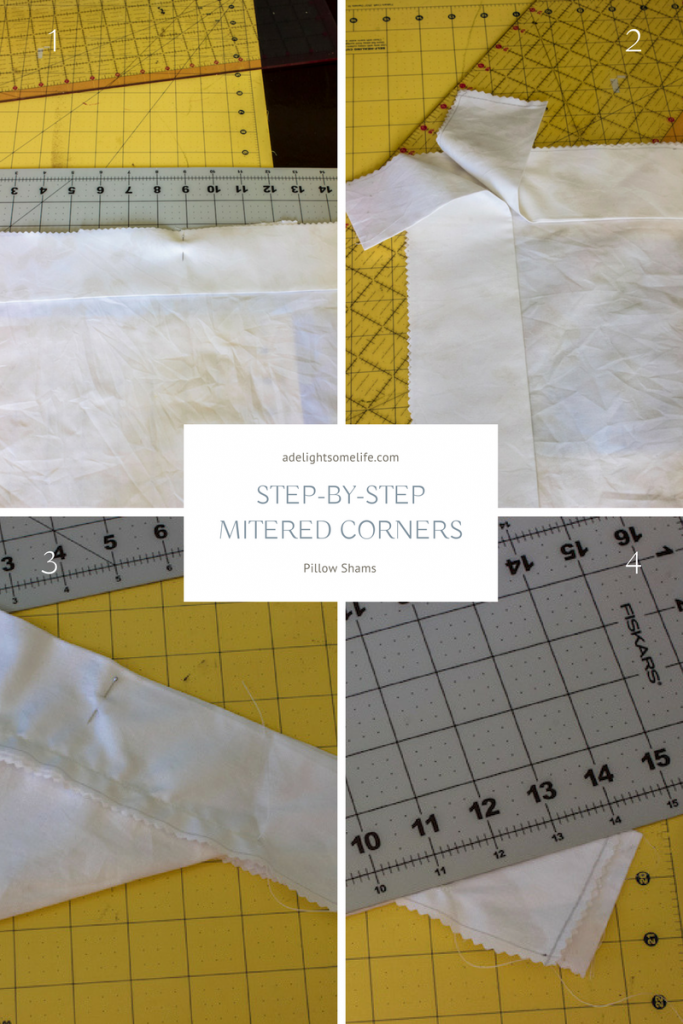
To Create the Mitered Corners
- From the short side to the long side fold over the front panel meeting together the two flange edges perfectly. Pin together
- Place a ruler alongside the folded edge and draw a line on the top flange piece.
- Sew along the line from top to bottom not sewing into the front panel.
- Trim the excess fabric and cutting at a diagonal the top of the mitered corner so that the seam edge does not show (see diagram)
- Open and lay flat to check the accuracy of your mitered corner
- proceed with these same steps to the rest of the corners
Creating the Pillow Sham
- Lay out the two back panels to measure the same length as the front panel. Pin and sew where the two pieces of fabric overlap
- Align the box sides to the seam of the front panel and flanges – pin together. Sew at the already sewn line; again leaving a 1/4 inch seam allowance
- complete sewing all sides
- with the wrong sides out pin the other edge of the box sides to the two pieces of the back panel; pin the pieces together and sew

You’ve created an envelope Mitered Corner Pillow Sham!
If you’d like to try this for yourself I’m including a PDF diagram of the measurements, the pieces you’ll need to cut and of the steps to create the mitered corner. This diagram will also illustrate how the back panels overlap (dotted lines)
I feel now that the guest bedroom’s decor is more complete. I do love the new look to this room. Not too long ago I shared a One Room Makeover over a period of a few weeks the steps I took to paint the room, the furniture and selecting the decor.
This room is a lovely place to relax, to read and to enjoy a lovely cup of tea. I love how inviting this room is for my guests! Now that all of the children are married, I’m making sure that there’s a guest bedroom for each couple when they come to visit (per chance at the same time!)
Step-by-Step PDF

Sharing with Wow Us Wednesday


