

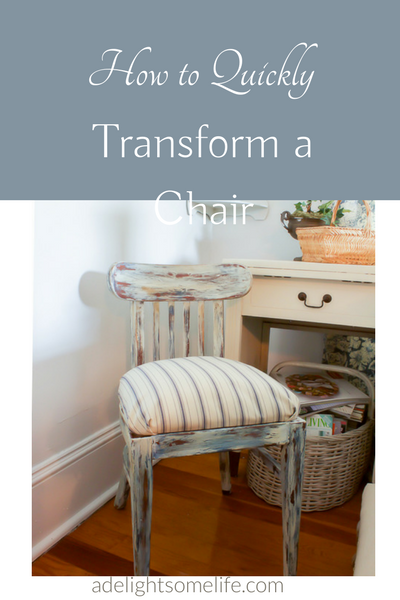

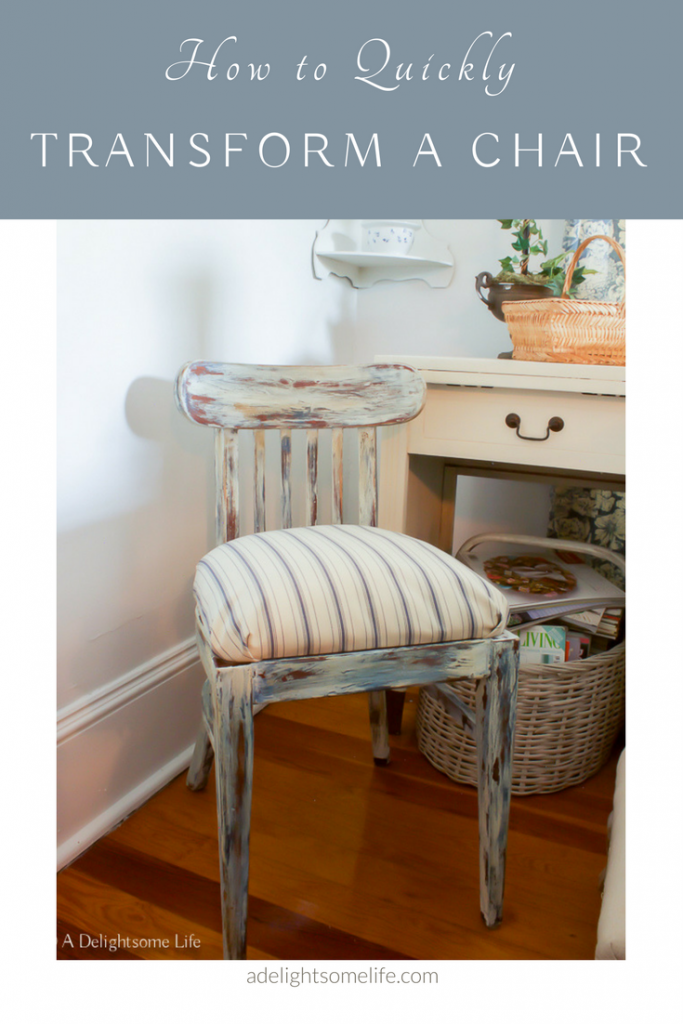
How to Quickly Transform a Boring Chair
This little chair has been in the guest bedroom for a couple years now. Whenever I would have a sewing project…that’s the chair I would sit in. I’m redoing the bedroom, removing some of the furniture and decor…I’m going for a whole new look. So, the chair, initially was out! Then I had another sewing project…I realized. This chair had to stay. It is the most comfortable, supportive chair for me to work in. It just needs a beautifying transformation!
![]()
Those Pieces of Furniture You Love, but…
Do you have one of those pieces of furniture that function perfectly or is the perfect size for a space, but it’s not visually appealing? These little ugly ducklings can become gems! They can ultimately, potentially become the favorite piece in a room. All you need is a little imagination.
Planning the Transformation
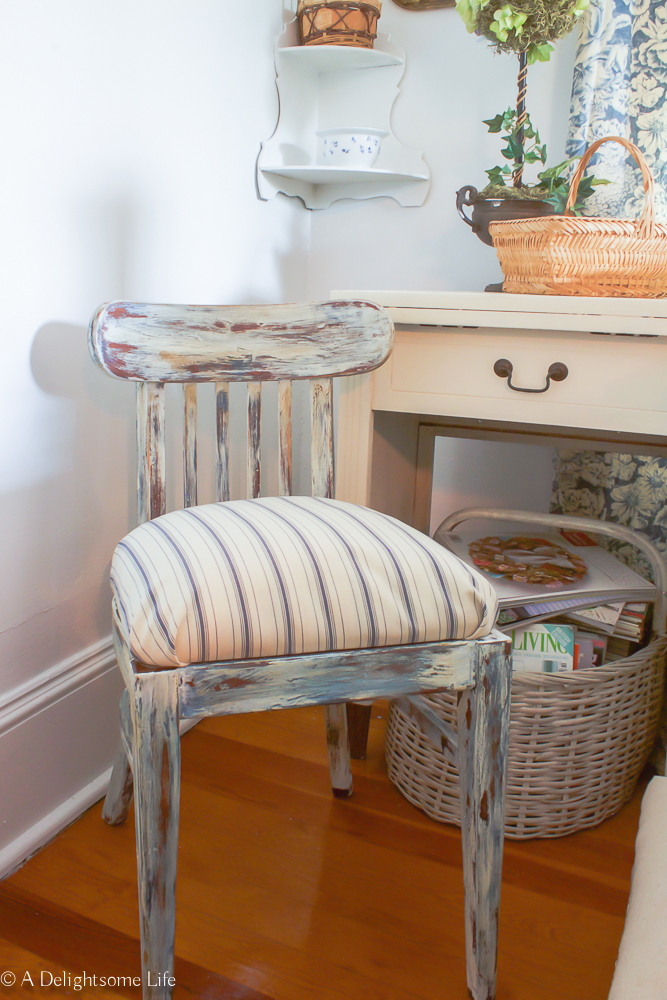
The room’s decor is light. The room is intended for guests…so my main thought is to transform it to beautifully complement the decor. The functionality – although it is the cause for my change of heart – is secondary.
![]()
Assessing the Chair’s Condition
When transforming a chair the first think you need to do is to make sure it’s sturdy. If you need to give it some support you can change out the screws holding the seat or use wood glue and clamps to secure any loose or wiggly part.
Then the easy transformation can begin!
![]()
Deciding on the finish….
This had me at a pause, for a while. The majority of the items in the room will be white…I don’t think I want this chair’s finish to be white. The complementary colors are blue and beige. Then, I read Fifi O’Neill’s Prairie Style…this is the decor style I’m working toward in this bedroom. One thing I noticed in several of the books photos – distressed furniture or stained furniture. I could have easily left this chair without paint…but, well, if you read my blog much, you know – I love paint! I also love the power of the transformation of paint.
So, I promised Quick…
This project was an overnight project because I allowed time for the paint to dry. Here’s what I did.
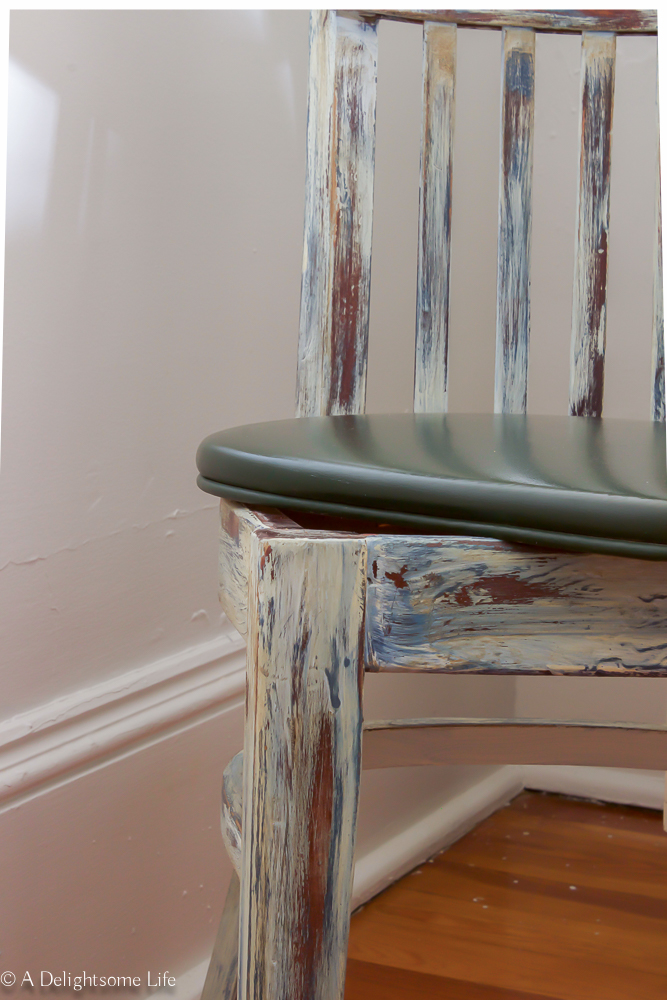
- The chair is already a bit worn at the edges. I sanded it down some more to remove the shiny texture and added a little more distressing.
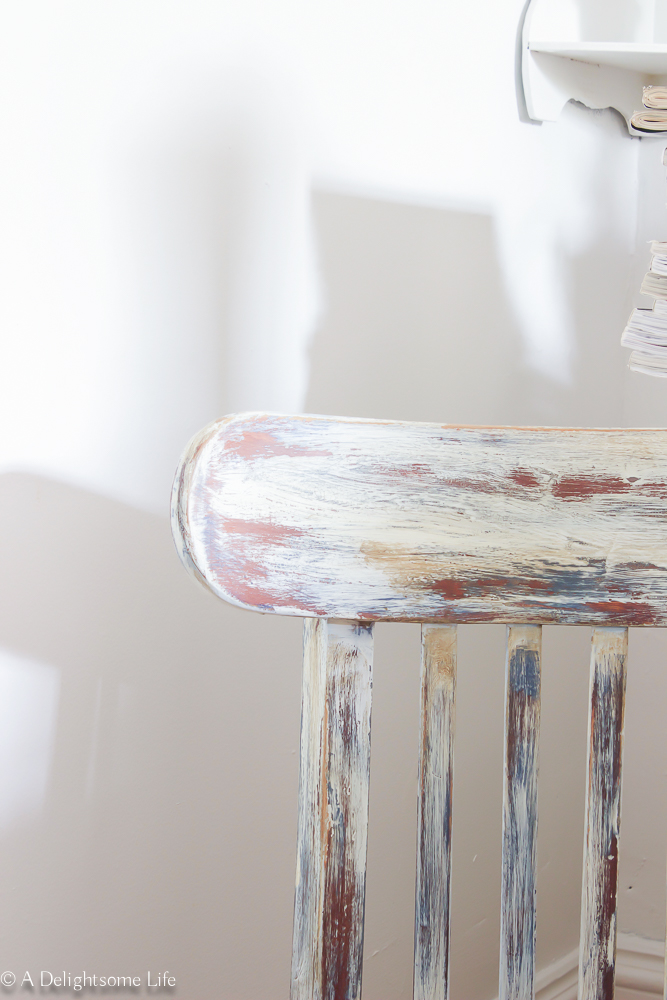
- Then I selected the paint; a dark blue and a creamy white. I also used a crackle medium.
- First I applied the crackle medium following the instructions. Then I randomly applied the blue with light strokes. I wanted some blue to show through after the final sanding. After about an hour giving this time to dry some, I applied the creamy white paint – all over, but lighter in some areas. These areas I wanted the wood to come through.
- Allow to dry overnight.
- In the meantime – the seat. This seat is thin. This seat is hard…This seat is not inviting for long spells of sitting without breaks to wake my legs! So, I added pillow stuffing and 1 inch foam.
- After removing the seat, I laid it atop the fabric I selected.
- I then added the stuffing then topped it with the foam. I lay the fabric over and turned the seat down – a fabric – foam – stuffing – seat bottom sandwich.
- I trimmed the fabric and the foam to allow for some of the material to cover over the bottom edge when stapled.
- With a staple gun I first made sure the fabric was aligned neatly then I stapled one at each center – front back and the two sides. I pressed down on the seat to compress the stuffing some…
- The corners are the trickiest. With rounded corners, unless the fabric has some stretch, you’ll need to fold. You can either fold toward the back or fold along both sides at the corner – it sort of looks like a man’s tie.
- Before stapling the corners, I cut notches in the fabric below the part that looked like a tie – less fabric the better. Trim as much as you reasonably can without having the fabric gap open.
- Staple – lots of staples all the way around drawing the fabric as neatly as you can.
- When the chair is dry with sanding paper with some grit – about 150 – sand away until you have your desired look. Again, I was going for distress and the edges took more removal – that’s where typically more wear would occur; also center back and along the legs.
- Aging the chair – I love Amy Howard at Home products. I used her Light Antique Wax lightly along the edges to give it character and to add more patina. Then I applied her Clear Wax all over – once dry – buff nicely.
- Reassemble the chair – I added a little longer screws to the bottom – since I’d changed the structure of the chair. The initial screws were pretty short and I wanted to make sure the seat was secure.
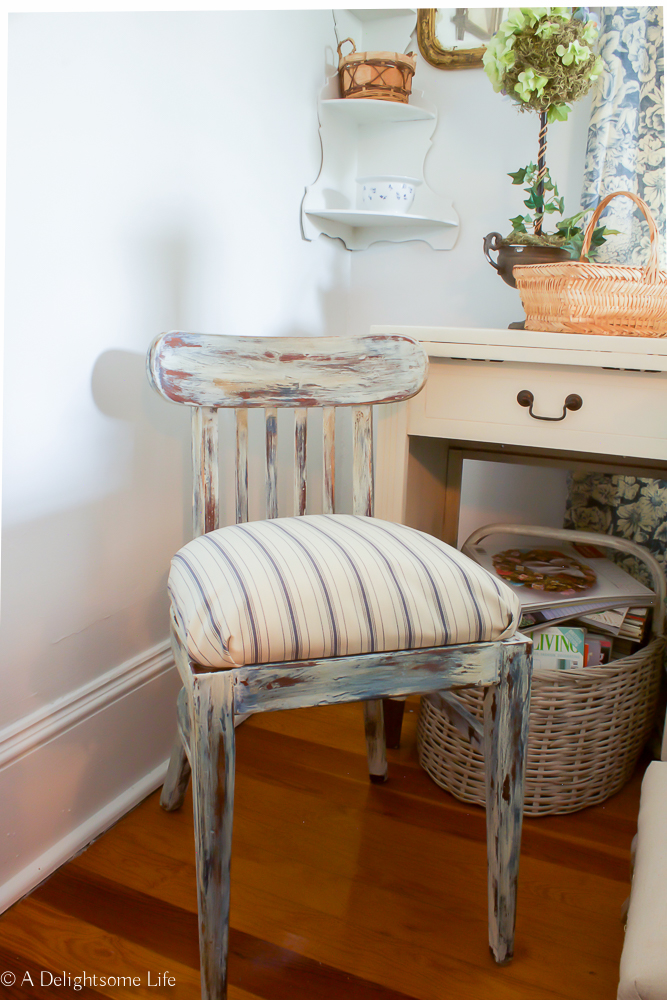
Voila! The chair is new – old now and a perfect little complement to the room’s decor! It will also continue to function – comfortably for me! Bonus.


